
A Schluter Strip is an important component to consider when installing floors, tile work, or any other professional internal improvement project. When installing new materials such as ceramic or stone tiles, a Schluter Strip is an efficient and effective way to protect against moisture and potential cracks. This article will teach you everything you need to know about using and installing Schluter Strips for your next professional installation in order to achieve excellent results. We’ll go over Schluter Strips’ material composition, optimal size and length, how to install them in various scenarios, and how to properly care for and maintain them after installation.

What is a Schluter strip?
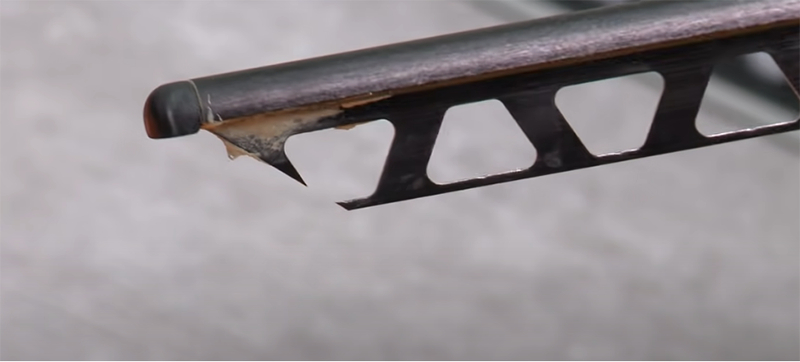
Schluter strip is a product with numerous advantages and applications in construction and installation. Tile edging is most commonly used in showers, bathrooms, countertops, and floors. This strip is extremely useful as a “protection profile” when properly installed into various substrates such as wood or plaster-based materials such as drywall. The thin metal slices protruding from its edges protect against chipping, cracking, and other damage caused by everyday wear and tear. They also ensure a secure, uniform finish in whatever application they are used in by providing a smooth transition from one surface to the next.
Schluter strips have the ability to reinforce weak substrate surfaces while shaping larger spaces where traditional tile finishing may not be possible. This allows for a wide range of construction methods, giving contractors tremendous flexibility in how they design each project. Individual profiles match all types of tiling projects, adding convenience with no audible differences in product performance regardless of whether interior or exterior applications are being installed.
Schluter strips are available in a variety of profiles, including customized shapes and colors, so even if aesthetic designs aren’t always a part of the overall picture, these protective bands are still eye-catching. Many company profile brands come as pre-formed board levels with trimming services for more complicated situations, making installation easier than standard tiling methods. Prices vary according to size and quality, but depending on usage, contractor pricing can stay quite low, making them very cost-effective investments.
Overall, Schluter Strip provides numerous benefits as well as innumerable applications inside homes, outside retail stores, and across industrial networks, all while maintaining a pleasing appearance and performing an important tile protection function. Its benefits demonstrate why it is the go-to finish for many building professionals worldwide.
How does a Schluter strip work?
Schluter strips are intended to function by establishing a barrier of protection between the tile and other surfaces, including countertops, floors, and walls. Additionally, they aid in ensuring that the grout lines are straight and even and that the tiles are properly aligned.
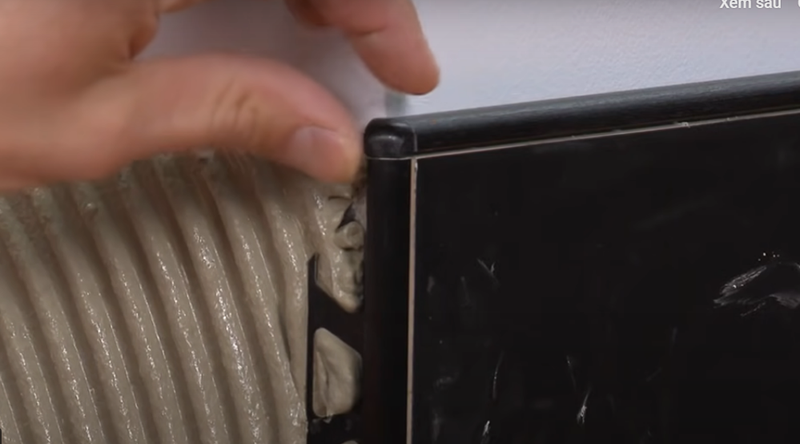
By burying the strips in the mortar or adhesive used to install the tile, the strips are put in place. They are placed along the tile’s edges and transitions, and after that, they are anchored with more mortar or adhesive. The strips are left exposed after the tile is put in and act as a decorative and practical finishing touch.
Why are Schluter strips important?
- They guard the tile’s corners and edges against chipping and cracking, which can happen over time from wear and tear. This keeps the tile’s aesthetic appeal while extending its lifespan.
- The tile installation is finished off neatly and professionally with Schluter strips. They produce a tidy appearance that improves the tiled surface’s overall appearance and conceals any flaws or irregularities in the tile edges.
- Schluter strips may also contribute to the tiled surface’s increased safety. They lessen the chance of tripping or falling by establishing a smooth transition between various flooring materials.
Proper Measurement and Preparation techniques for Installing a Schluter Strip
Proper measurement and preparation for installing a Schluter strip are critical for its successful installation. To ensure that the strip is properly installed, several steps must be taken.
The first step in getting ready to install a Schluter Strip is deciding where it will go on the floor or wall. This should be done before measuring because the measurements of the strip should include the exact placement location of the strip. Once you’ve decided on a location, make sure that any adhesive used to secure the strip is compatible with your surface type and, if applicable, can withstand prolonged water exposure. Before installing the Schluter Strip, inspect all surfaces where it will be installed and repair any damage, such as cracks or holes.
The next step is to determine the length of Schluter Strip required for the job. Use a tape measure or other long ruler-like device to measure accurately, and always account for the width of the Schluter Strip. Make a note of these measurements because they will be required later to properly cut your chosen strip. Our most common strip widths range from 3/16′′ (4mm) to 34″ (19mm).
After properly measuring, you are now ready to prepare for installation by cutting your chosen Schluter strip to size. For smaller strips, use scissors or sharp snips, and for wider strips (up to 25mm wide), use tin snips. When cutting, avoid leaving rough edges; smooth them down later with sandpaper or an appropriate file.
After you’ve finished preparing, you can start installing your freshly cut Schlueter strips! Please refer to other relevant documentation available online for more information on how to best install a Schluter Strip. A successful installation of your Schluter Strips will be achieved with proper planning and preparation techniques, resulting in many years of maintenance-free enjoyment!
Understandig Schluter Strip Grades and Materials Available
Schluter strips, also known as expansion joint profiles or edge protection profiles, are required for tile and stone installations. Their purpose is to protect the outside edges of both materials from damage caused by thermal movement. Furthermore, they provide additional stability and support in areas prone to cracking. Schluter strips are available in a variety of grades and materials, making them suitable for a wide range of tiling projects on both floors and walls, both indoors and outdoors.
It is critical to consider the intended application as well as the type of coverings that will be used when selecting a Schluter strip grade. Schluter strips come in rigid or flexible varieties. Rigid strips are typically made of aluminum, and their profiles are simpler than those of flexible strips. These more basic forms, however, frequently lack aesthetic appeal, making them better suited for use in less visible areas such as corners or around bathtubs. Flexible strips typically have more intricate designs that run the length of walls and floors, adding texture and interest to the space. This variation makes them ideal for use in decorative applications requiring more showmanship.
When selecting your Schluter strip, you can choose from a variety of materials in addition to rigid vs. flexible grades. Among these are stainless steel, anodized aluminum, PVC-coated steel, ECOsatin ALU-PVC, brass, aluminum profiles with extrusion profiles and metal powder coat finishes, schuleredge profiles in PE-HD and PE-LA, etc., compounds coated with special sealant (HFM10136), PE/EVA foam, and epoxy resin-based adhesives. Each material has distinct properties that make it best suited for specific tasks, as well as cosmetic preferences and budget considerations based on the required length and width for your job site.
Understanding the various Schluter strip grades and materials available allows tile professionals to properly select the appropriate product for their project needs, regardless of the complexity or size of their endeavor. This ensures a successful installation that not only impresses clients but also stands the test of time!
Recommended Tools and Supplies Needed to Install a Schluter Strip
When installing a Schluter strip, having the right tools and supplies is critical to ensuring a smooth installation process. This article will give you an overview of the supplies and tools you’ll need to complete the installation successfully.
To begin, you’ll need some basic materials like adhesive, leveling compound, and a grout saw or multitool. The adhesive should be chosen based on its compatibility with the material used in the Schluter strip itself; typically, this is silicone caulk or epoxy-based adhesive. Leveling compounds should also be chosen based on the material of your substrate, which can include patching compounds, thin-set mortar, and latex-modified concrete products. These compounds are essential for producing even surfaces for the strip to adhere to and preventing lippage in the final product. A grout saw or multitool can also be useful for cutting small pieces and ensuring everything is properly sized before installation.
Following that are tools designed specifically for working with Schluter strips. To aid in the creation of tight transitions between floorboards, consider purchasing a trim router with templated guide bushings that match the profile shape of your strip. Planers, edge trimmers, tapping blocks, rasps, and rowels are also available, all of which are ideal for providing precise detail to each project when it comes time to install. Finally, have plenty of straight edges (such as ruler-style measuring boards) on hand to ensure accurate lines when connecting pieces.
Finally, when handling any tools required for Schluter strip installation, always wear appropriate safety equipment—goggles are always recommended! When using tape tools, always apply even pressure across entire surfaces. With these helpful hints and the items listed in this article, you’ll be well on your way to installing Schluter strips perfectly every time!
Troubleshooting Common Issues with Installing a Schluter Strip
For those unfamiliar with the process, installing a Schluter Strip can be intimidating, but it doesn’t have to be. Anyone can install a Schluter Strip like a pro by following these simple steps and troubleshooting potential issues.
Schluter strips are an essential part of tiling projects. It serves as a transition between different materials, such as vinyl or laminate flooring and tile. It maintains uniform tile spacing and keeps moisture away from the subfloor. Installing one is relatively simple, but there are some common issues that arise.
Measuring Accurately: When installing any type of transition strip, precise measurements are essential. When using a Schluter Strip, you must consider variables such as the width of your tiles, their orientation on the floor (will they run diagonally or straightly? ), and the direction of the grout lines. Because it must fit flush against the edges of all four tiles (or more) at the same time, each variable influences how long your Schluter Strip must be. You won’t get a uniform edge on all sides if you measure incorrectly and cut your strip too short; if you make it too long, you’ll waste material and money.
Troubleshooting adhesive problems After you’ve correctly measured and cut your strip, the next step is to apply adhesive to the base of your strip before laying it down on the desired area. For best results, use an adhesive designed specifically for tile installations. Always read product descriptions carefully before purchasing anything! When applying adhesive, use thin strips rather than blobs to keep levels consistent around each side of the strip; also, press it smoothly into every corner to eliminate air pockets that would weaken adherence over time. Allow enough time for your adhesive to dry (at least overnight) before proceeding with the actual laying out of your tiles.
After allowing sufficient drying times after gluing down your strip, secure it firmly in place by “snapping” pressure along each side until all sections appear level against adjacent surfaces (this means verifying its position with a spirit level). Remember that if either end dips downward instead of lying flat against its direct neighbors, it may affect installation for later margins or even result in misaligned patterned designs due to uneven contact between different tiles or surfaces—make sure all allowances for alignment are made afterwards!
Finally, remember to thoroughly inspect final placements upon completion; this should include looking carefully into any gaps between how close one tile came into contact alongside another versus across entirely new spaces created by dimensional placement differences between them (you may need additional sealant protection here as well).
Conclusion
Schluter Strips can help any floor tile or stone installation look professional and high-quality. These strips provide stability to tile edges or corners, allowing for a smooth transition between materials and an optimal finished look. Schluter’s size range allows you to find exactly what you need for any job, big or small. Schluter Strip’s easy-to-install properties and customizable sizes make tiling and stone installation a breeze, ensuring that your dreams of beautiful rooms come true!
Excerpt
Schluter Strip is a metal edge-protection and transition profile designed to cover rough edges when installing tile or other hard-surface flooring. It contributes to a professional, uniform appearance while also protecting the tiles’ transition points from cracking and chipping. Installation is simple and produces long-lasting results.

We’re Emma Carole Paradis and Kimberly Carole, the owners and designers of Impeccable Nest, based in Bedford, New Hampshire. A mother-daughter team with a love of design. Originally from Manhattan Beach, California, now based in Bedford, New Hampshire, we bring a Southern California cool and New England tradition to our design. Not only do we work together…we also live together in a multi-generational home…and a home that they are known to design for others.