
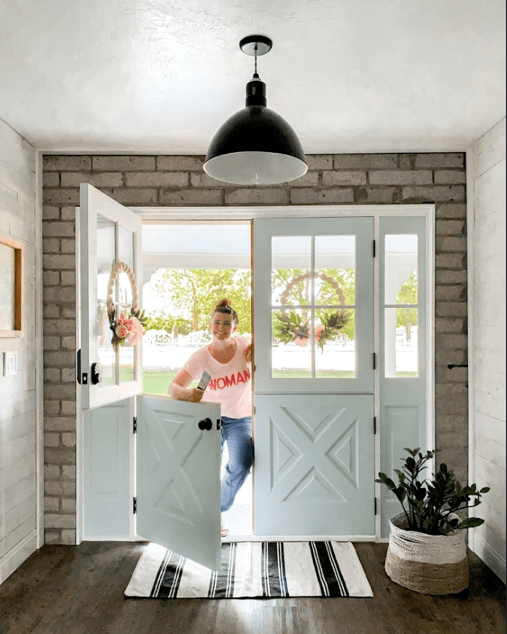
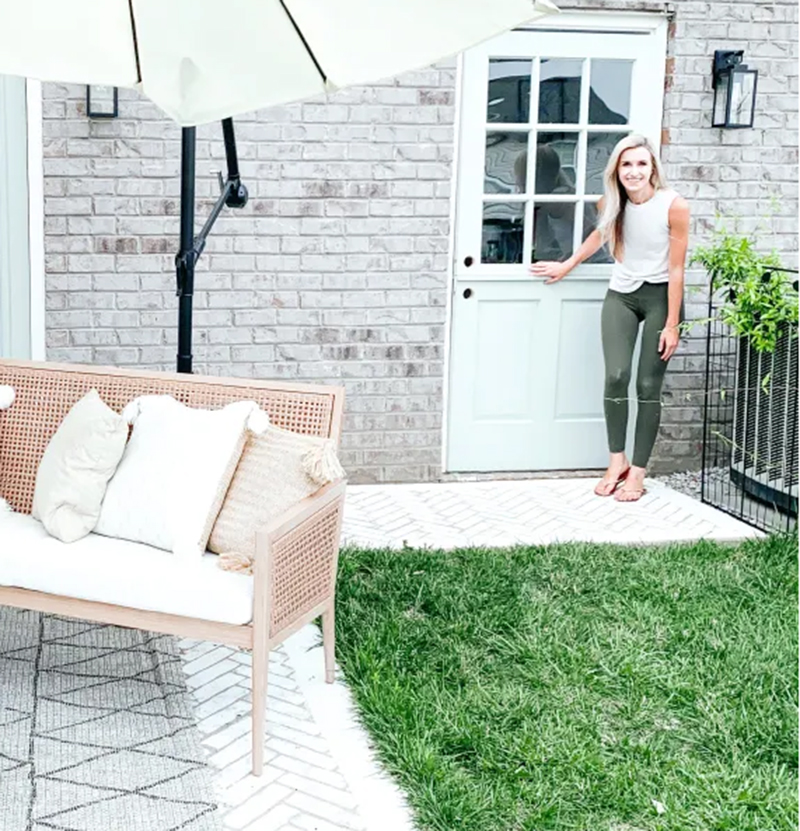
If you’re a parent who wants to create a magical and imaginative toddler room, then installing a Dutch door is a great way to start. Not only will it add a touch of fun and whimsy to your little one’s space, but it can also provide practical benefits, such as helping to regulate temperature and airflow. However, crafting the perfect Dutch door for a toddler room can be a challenging task, and you might be wondering where to begin. In this article with Impeccable Nest, we’ll guide you through the process of building the ultimate Dutch door for a toddler’s room, from the essential tools you’ll need to the materials required to create a one-of-a-kind half door that your child will absolutely love. So, let’s get started on creating a magical space for your little one!
Benefits of a Dutch Door for a Toddler’s Room
- Safety
When it comes to choosing a door for a room that a toddler uses, one of the most important considerations should be safety. Parents can ensure that their child is safe within their room while still allowing for easy monitoring and access by keeping the top half of the door closed while leaving the bottom half of the door open. This configuration of the door is called a half door.
- Versatility
Half doors for daycare are extremely versatile and can be used in a variety of settings and applications, such as dividing play areas or establishing a cozy reading nook.
- Ventilation
They also make it possible to have more ventilation, which is something that can be especially helpful during the warmer months or for children who have allergies.
- Aesthetic value
It is impossible to ignore the aesthetic value that a Dutch door baby gate possesses. They lend a one-of-a-kind and enchanting air to any space, which makes them a delightful as well as practical addition to your home.
How to Make a Dutch Door for a Toddler’s Room
A fun and rewarding project, making a Dutch door for a toddler room is one that requires careful planning and execution in order to be successful. It is important that you take the time to plan out the design of your new Dutch door and measure the dimensions of the door frame before you start working on it. As soon as you have a crystal clear idea of what it is that you want to accomplish, it is time to get rid of the old door and install a fourth hinge so that the new door can support its own weight. After that, cut the door in half and install a frame along the cut to create a Dutch door that is both secure and stable. After mounting the door, the knob, and the latch, it is time to add trim to your newly installed Dutch door in order to give it the appearance of being finished and polished. In the end, complete your do-it-yourself project by applying a coat of paint or stain to coordinate with the theme of your child’s bedroom and adding any finishing touches. Following these straightforward instructions will allow you to fashion a Dutch door that is not only charming but also practical for your child’s bedroom, which they will adore for many years to come.

What You Need to Have in Order to Make a Dutch Door
The installation of a Dutch door in the bedroom of your young child calls for the utilization of a number of fundamental tools and components. To begin, gather the necessary tools, which include a circular saw, an orbital sander, a chisel, and fundamental measuring instruments like a measuring tape and a pencil. In addition to that, you will need a nail gun, a drill, a hammer, and a screwdriver. You will also need woodworking clamps and a woodworking router. You will need a solid wooden interior door, a doorknob, screws, and nails for the project. Additionally, you will need an interior door hinge that coordinates with the door. You will also need a 1×6 that is six feet long. You will need a pine plank, wood glue, and a quart of semi-gloss latex paint, in addition to a paintbrush or roller, a paint pan, and a drop cloth, in order to create a one-of-a-kind and practical Dutch door that your child will adore.
DIY Dutch Door Using Existing Door
Your goal as a parent should be to make your child’s bedroom a happy and secure place for them to spend time, and a Dutch door is an excellent way to accomplish this. If you have the right equipment and materials, you can make a Dutch door that is both stylish and functional for your child’s bedroom.
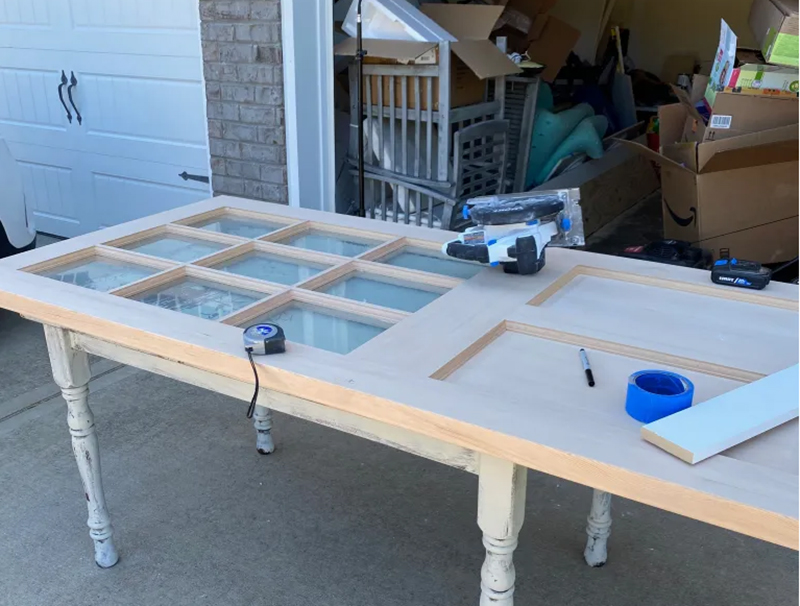
STEP 1: MEASURE AND COLLECT
An unfinished exterior door is a good place to start, as it provides a blank canvas for your creativity to flourish. Combine this with some 1×4 pine boards for added structure and support, and you’re well on your way to completing the project. Constructing a Dutch door for your toddler’s room can be a fun and rewarding experience, but it requires the right materials and tools to get the job done.
But the door is only the beginning. In order to make the door truly functional, you will need to invest in a door handle and lock, a door latch, and weather stripping to keep the elements at bay. Bulls-eye primer and plastic wood will ensure a smooth and sturdy surface, and caulk will seal any gaps or cracks. Finally, don’t forget about the hinges! Although they are relatively unassuming, they play a significant role in the door’s ability to perform its function.
Foam paint rollers and Wooster paint brushes will make applying exterior paint a breeze, while a finish nailer and C clamps will help you secure everything in place. Of course, the right tools are just as important as the materials themselves. HART Tools is a reliable option that offers everything from a circular saw to a router to help you achieve precision and accuracy in your cuts.
Your child’s safe haven is waiting for you, and with a little bit of imagination and ingenuity on your part, you can make a Dutch door that they will treasure for many years to come. Now that you have everything you need, it’s time to roll up your sleeves and get started!
STEP 2: CUT DOWN YOUR DOOR
It’s natural to feel unsure about making such a significant change, but with the right tools and approach, you can make the cut with confidence. One of the most intimidating steps is cutting a full, standard door in half to create the two halves that are necessary for a Dutch door. Creating a Dutch door for your toddler’s room can be an exciting project, but it can also come with its fair share of challenges.
Take your time measuring and marking your cuts, and double-check your measurements before proceeding. Once you’ve made the cut, evaluate the quality of the halves to determine whether or not they are suitable for assembly. Your best bet for achieving a straight and clean cut is to make use of a circular saw. However, it is important to approach the task with patience and precision, as mistakes can be costly.
Remember that the journey of any project begins with a single step, so take a deep breath, gather your tools, and make the first courageous move toward creating something that your toddler will cherish for many years to come!
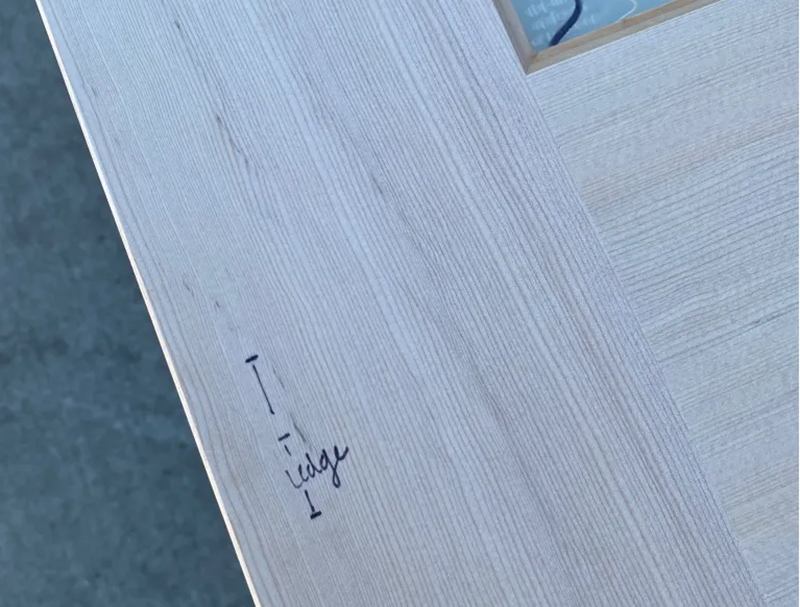
If the door is too tall or too short in relation to the door frame, adjustments will need to be made for a proper fit. Trimming the top or bottom of the door is one solution, but it is important to measure and mark your cuts with precision to avoid any mishaps. Creating a Dutch door for your toddler’s room requires more than just the right tools; it also requires careful planning and some math skills.
There is also the possibility of installing a ledge on the bottom half of the door, which can be done by making use of a 1×4 select pine board that is 3/4 inches thick. The ledge not only gives your toddler a place to put their belongings, which is very practical, but it also gives your Dutch door a little bit of style, which is very nice. As you make your plans and take your measurements, don’t forget to think about how practical and secure the door to your child’s room will be.
It is important to keep in mind that installing a Dutch door in your child’s bedroom is more than just a simple do-it-yourself project; rather, it is an investment in your child’s wellbeing and security. You can provide a place for your child to grow up that is both safe and enjoyable to play in with some forward thinking, careful planning, and attention to detail.
As you get started on constructing a Dutch door for your child’s nursery, you will quickly realize that there are a lot of specifics that need to be taken into consideration.
If you want to add a ledge to the top of the bottom half of the door, for instance, you will need to cut a 1.5-inch notch out of the center of the door section to account for the board’s thickness of 3/4 inches as well as the additional height of 3/4 inches.
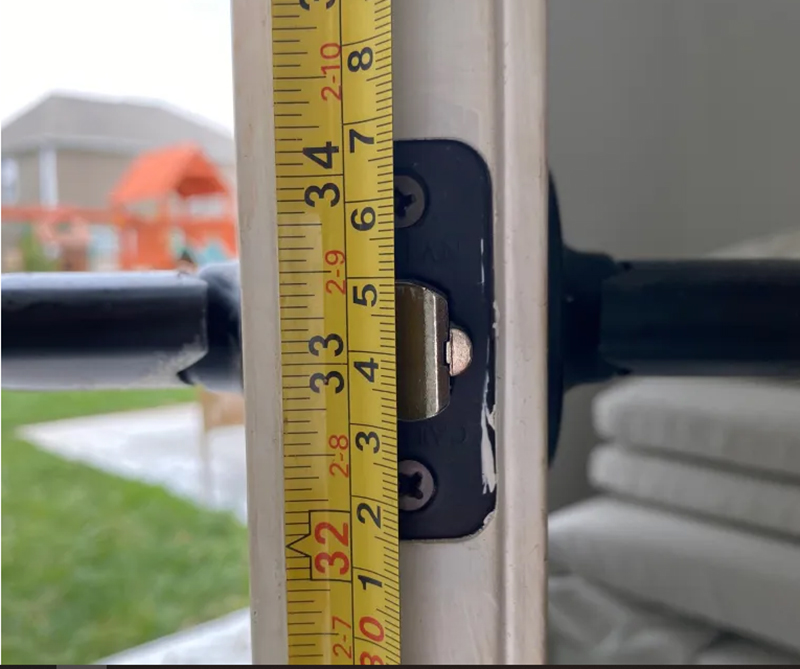
In addition to this, you will want to check that the holes in the door frame are large enough to accommodate both the door latch and the deadbolt that you will be installing.
Before making any cuts, you should first mark the height of the handle and deadbolt on the door. Once you have done this, clamp the door to a work table and attach a guide board to the door so that you can make sure your cut is clean and straight.
Finally, use your circular saw to make the cuts, moving slowly and steadily while staying on track to ensure a professional-looking Dutch door for your toddler’s room. With a little bit of patience and attention to detail, you can create a beautiful and functional Dutch door that your little one will absolutely adore.
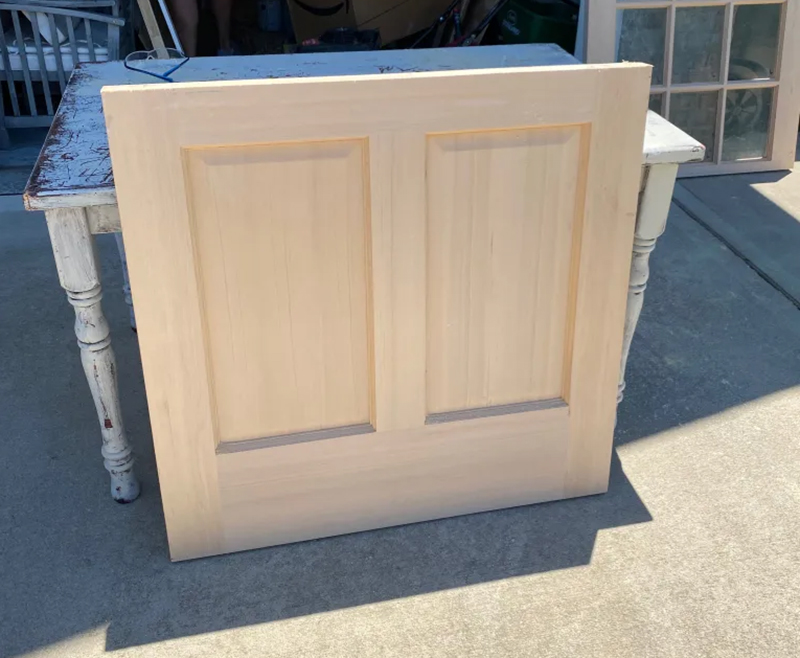
Now that you’ve successfully cut your door in half and everything has been going according to plan, it’s time to take your Dutch door to the next level by adding a ledge. This is where the real fun begins! “sliver that was removed from the middle of the door by you in order to make space for the ledge. Now you are ready to move on to the exciting part, which is adding a ledge that will not only look great but also provide a handy spot for your toddler to rest their books, toys, or other treasures. This is the part that you have been waiting for. You will be amazed at how simple it is to create a stunning Dutch door that will delight both you and your little one with just a little bit of creativity and a few simple tools.
STEP 3: ADD YOUR LEDGE
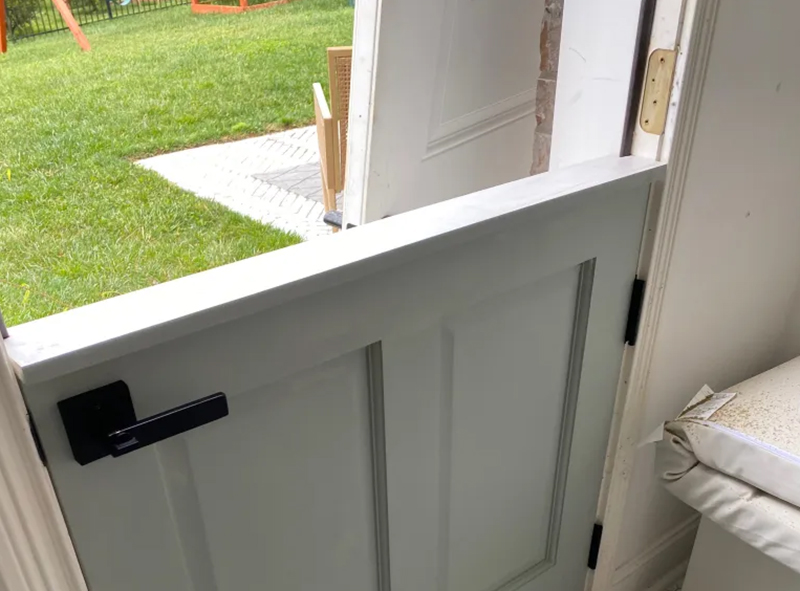
The addition of a ledge to your Dutch door not only gives it a touch of traditional charm, but it also makes it more functional by providing a place where you can easily lean over and look outside the door. To create this timelessly elegant appearance, simply grab a board made of select 1×4 pine and cut it down to the size of your door. When you have the board in hand, position it so that it is centered on the lower half of the door, and then use a finish nailer to fasten it in place. This will give your door a finished appearance that is sure to impress not only you but also your little one. You can make a Dutch door for your toddler’s room with a little ingenuity, some simple tools, and a lot of fun. This door will not only look fantastic, but it will also serve as a useful and entertaining addition to their space.

To give your Dutch door an appearance that is more professional, you will need to pay close attention to the details and be willing to go the extra mile. It’s easy to look past seemingly insignificant flaws, but in the end, it’s often the little things that end up making the biggest impact. It is important to take a step back and examine your work with a critical eye after you have finished caulking the edges and filling in the nail holes caused by the nails. Do we need to address any gaps in coverage or inconsistencies that have been found? If that’s the case, you should stop what you’re doing and fix the problems before moving on to the next step. It might seem like a trivial adjustment to notches out the squares on each side of the door frame, but the attention to these kinds of minute details can make the difference between a door that doesn’t function properly and one that does. Therefore, take your time, maintain your concentration, and do not be afraid to make those additional cuts or fill in those additional gaps; your Dutch door will be grateful to you in the end for doing so.
STEP 4: PREP FOR YOUR HARDWARE
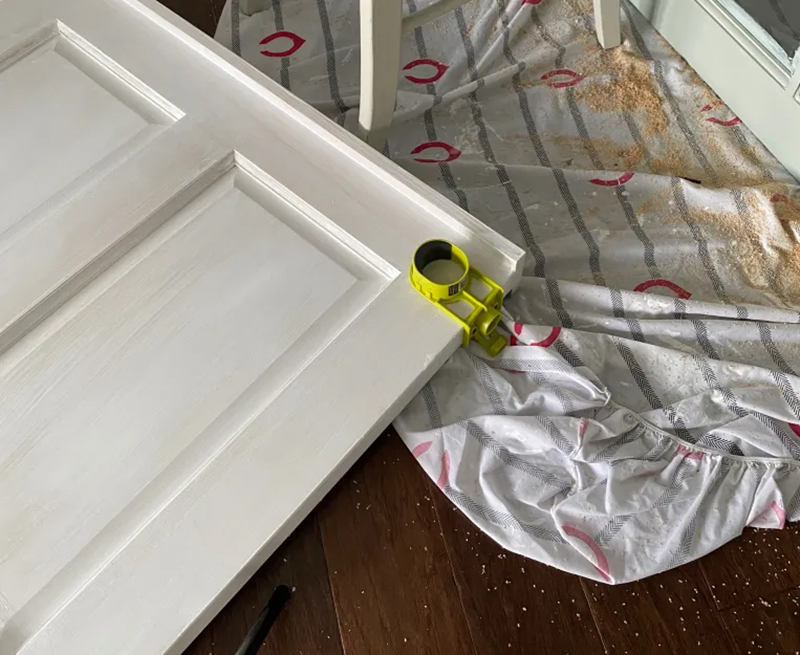
As soon as you’ve finished routing out the hinges, it’s time to install the handle and the deadbolt. Make certain that you drill the holes in the appropriate places by utilizing a template for the door knob. Check everything twice, even three times, before you start drilling! This is a very important step, and you don’t want to mess it up.
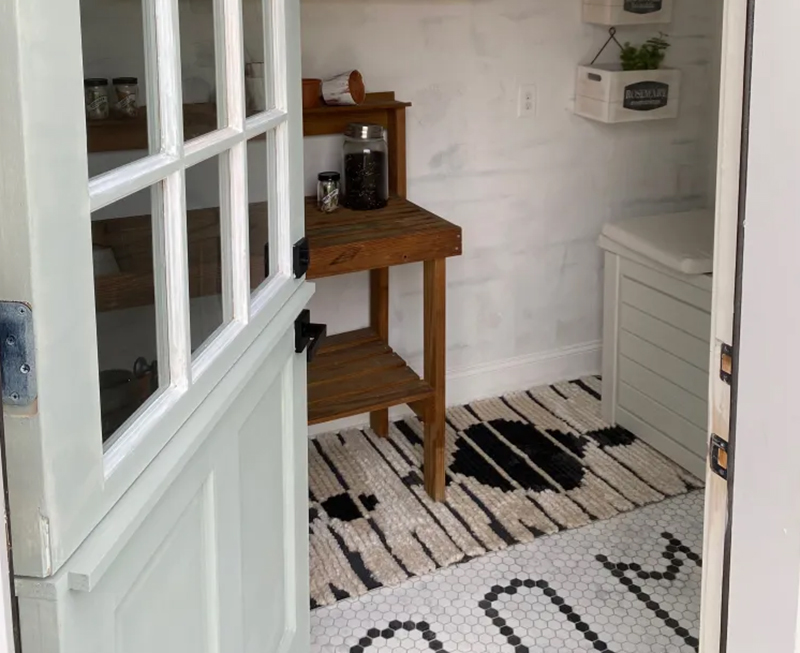
After you have installed all of your hardware, it is time to prime and paint the project! To ensure that I had a solid foundation, I primed it with Bull’s Eye Primer. After that, I used some paint brushes made by Wooster and a green paint made by Magnolia called Early Riser to achieve the ideal hue of green.
After the paint has had sufficient time to dry, you can install weather stripping around the door frame to ensure that your Dutch door is completely free of drafts. And voila! You’re done! A stunning Dutch door, perfect for the bedroom of your young child or really any other room in the house.
When you have finished cutting out the space for your hardware, you can move on to installing the hinges on the door and then attaching them to the frame. At this point, you’ll really start to see the Dutch door take shape before your very eyes! Before moving on to the next and final step, check to make sure that everything is secure and level. Don’t let yourself get too caught up in the excitement.
The installation of weather stripping on your door is a step that is frequently skipped but is essential if you want to ensure that your child’s bedroom is warm and free from drafts. Even on the coldest days, you can ensure that your child is comfortable and warm by installing the appropriate weather stripping in the appropriate places.
The very last step, but certainly not the least important one, is to apply a new coat of paint in the color of your choosing. It is up to you to decide whether you want to go with a color that is bright and vivid or one that is subtle and pastel. You will be amazed at how much a new coat of paint can transform your Dutch door into a functional and charming addition to your child’s bedroom when you exercise a little bit of patience and pay attention to detail during the process.
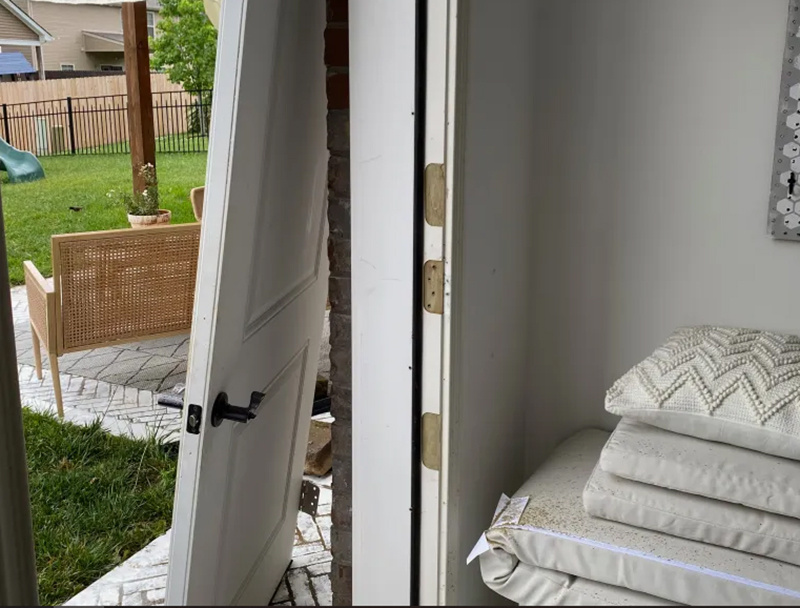
After you have finished preparing your door and door frame, it is time to install the hardware. The first thing you should do is attach the hinges to the door, making sure that they are aligned with the routed spaces you made earlier. After that, attach the hinges to the door frame while ensuring that the door is level and that it is touching the frame completely. After you have ensured that your door is hinged correctly, it is time to install the handle and the deadbolt. Make sure to use the appropriate screws and tools, and make sure to follow the instructions that are included with your hardware kit. Don’t forget to check that your door can both swing and latch properly by giving it a test run! And there you have it: a beautiful Dutch door that will add charm and functionality to your home. This door can be installed in the room where your toddler resides.
STEP 5: PRIME & PAINT
During the do-it-yourself process, painting your Dutch door can be a fun and creative activity. Spend some time thinking about the various options available to you and choose a shade for your child’s bedroom that not only looks great but also goes well with the rest of the space. You should give some thought to using a high-quality paint that can withstand the day-to-day use that it will be subjected to. It is recommended to apply multiple coats of paint in order to achieve a more even and vibrant color. As soon as the paint is completely dry, you can begin installing the hardware. Make sure that you carefully follow the instructions in order to guarantee that everything is installed properly. It is essential for the safety of your toddler that you test the door to ensure that it opens and closes without any issues and that the hardware functions appropriately. After you have finished installing your new Dutch door, the door in your toddler’s room will be a beautiful and practical addition that you and your child will adore.
The installation of a Dutch door in your child’s bedroom is not only an adorable decorative touch but also a sensible response to a problem that many parents experience. The Dutch door’s one-of-a-kind construction makes it possible for you to keep an eye on your young child while still allowing them the freedom to investigate their surroundings on their own. Dry fitting is an essential step that can’t be skipped, but before you can reap the benefits of this half-door design, there’s something else you need to take care of first. You will avoid any frustration or safety hazards in the future if you make sure that the door fits perfectly in the frame and moves easily by first ensuring that it does so. After you have finished this essential step, it is time to move on to painting the door. It is imperative that you select a paint that is safe for children to use and does not contain any volatile organic compounds (VOCs), as this will ensure that your child can safely play in their room as well as sleep there. And with a few coats of paint and some hardware strategically placed, your Dutch door can turn your toddler’s room into a warm and functional space that you and your child will enjoy spending time in together. Why hold off then? Invest in a Dutch door right now to give your child the gift of a stylish space that is also safe.
STEP 6: INSTALL YOUR HARDWARE
Congratulations! You have reached the conclusion of the process of installing a Dutch door in the bedroom of your young child. Installing the door handle, deadbolt, and hinges on your door is the final step before putting the finishing touches on it. Don’t worry; it’s much simpler than you probably imagine it to be!
To begin, ensure that each component is installed correctly by carefully reading and adhering to the instructions that came packaged with it. When it comes time to install the hinges, you need to double check that you have them facing the correct direction, and this will depend on whether or not your door opens inward or outward. When you are ready, here is a pro tip to ensure that your door remains securely fastened in place: Grab some longer screws to attach the hinges.
If you use longer screws, you will be able to create a connection between your door and its frame that is both more secure and more stable. When it comes to a Dutch door, this is of the utmost importance because the door consists of two halves that have to be aligned in the exact same way for it to work correctly. You will be able to have peace of mind knowing that your toddler is safe and secure in their room if you take this additional step to ensure that your door is properly fitted and functioning by ensuring that it is tightly fitted.
Your Dutch door can now be used after the installation of the handle, deadbolt, and hinges has been completed. It is now ready to be enjoyed. Not only does it offer a practical means of dividing the space in which your toddler plays, but it also imparts a certain amount of allure and personality to the surroundings. So go ahead and give it a shot, and then sit back and enjoy watching your young child revel in the newfound comfort of their space.
STEP 7: INSTALL YOUR DOOR
It’s time to get moving and install that Dutch door in your child’s bedroom so they can feel more secure! You’ve done everything that was required to get ready, and now it’s time to put everything you’ve been working so hard on into action. Now, take hold of that door, and I’ll show you where to start.
To get started, line up the spots on the door and the frame where the hinges are going to be installed. Don’t forget to take your time and check that everything is perfectly aligned after you’ve finished. After you have adjusted the position to your satisfaction, it is time to fasten the hinges into position.
It is recommended that you use longer screws when attaching the hinges to your Dutch door in order to guarantee that the door is correctly secured and will operate as intended. This will help keep your door firmly in place, preventing it from moving or sagging over time as a result of normal wear and tear. You will be able to continue to appreciate your Dutch door for many years to come if you employ this strategy, which is not only straightforward but also highly effective.
Your Dutch door is now complete and ready to be utilized after the hinges were successfully installed. Your young child will enjoy the independence that comes with having their own unique space, and you will value the sense of calm that comes from being able to keep a close eye on them. Don’t procrastinate any longer; seize that door and have it installed as soon as possible.
A door that does not properly fit its frame is one of the more common problems that you might experience. However, there is no need to worry because there are straightforward answers to this problem.
To begin, try adjusting the hinges to see if you can get the door to fit correctly by making the necessary adjustments. If that doesn’t work, you might want to try sanding the sides of the door a little bit until it fits the way it should. It’s possible that this will require some time and patience on your part, but it’s time well spent if you want to ensure that your door functions correctly and looks great.
After you have successfully installed your Dutch door and ensured that it fits properly, it is time to install the latch. Spend some time thinking about where you want it to go, and if necessary, make sure to drill pilot holes for the hardware of the latch before you install it. In order for the latch to reach the bottom half of the door, you will need to drill a hole through the ledge of the door using a large drill bit. This will make it possible for you to lock the door securely in place, giving you an increased sense of peace as a result.
It is essential to keep in mind that installing a Dutch door does require some degree of problem-solving and troubleshooting on your part. Nevertheless, if you keep a level head and practice some patience, you should be able to triumph over any obstacles that stand in your way. Therefore, take your time, keep these suggestions in mind, and before you know it, the room in which your toddler sleeps will have a charming and practical Dutch door that they will cherish for many years to come.
Congratulations! You’ve almost reached the finish line with the installation of the Dutch door in your child’s bedroom. Now is the time to add the finishing touches to make sure that your door is not only weather-resistant but also functional.
First, screw the hardware into its new location to ensure its stability. Make use of longer screws to ensure the highest possible level of security and to firmly hold everything in place. This will assist in preventing the hardware from becoming loose over time, thereby ensuring that your door will continue to operate correctly for many years to come.
The next step is to install weather stripping along the bottom of the doors, beginning with the top half and working your way down to the bottom. This will help protect your door from the elements, preventing dampness and drafts from entering the room in which your toddler is sleeping. Be sure to install weather stripping on the door frame as well, if it is not already there. If the door frame does not already have weather stripping installed, you will need to install it.
After you’ve finished installing the weather stripping on your Dutch door, take a moment to admire its stunning appearance. You have the satisfaction of knowing that you have created something one-of-a-kind and unique for your child’s bedroom because you did the installation yourself, which not only resulted in financial savings for you. Watch as your young child blossoms in the new and unique environment that you have created for them as you take pleasure in the increased amount of natural light and air that a Dutch door provides.
Tips for Maintaining a Dutch Door in a Toddler’s Room
If you have a Dutch door installed in your child’s bedroom, it is imperative that you keep it in pristine condition in order to ensure that it will serve your family for many years to come. It doesn’t have to be a hassle to maintain your door—instead, all you need is a simple routine to follow in order to keep it looking great and ensuring that it continues to function as it should. To begin, take a damp cloth and clean the door on a consistent basis to remove any dirt or grime that may have accumulated. This will not only help the door maintain its spotless and pristine appearance, but it will also help prevent any scratches or other damage from appearing over time. Next, you should make it a habit to lubricate the hinges on a regular basis so that they continue to move freely and are free of any squeaking or sticking sounds. It is essential to perform routine maintenance checks on the latch in order to ensure that it is catching correctly and firmly. If you notice any problems with the door, such as sagging or difficulty latching it, it is important to address them as soon as possible in order to prevent any additional damage from occurring. Your Dutch door can continue to be a secure and charming addition to your child’s bedroom for many years to come if you just give it a little bit of care and attention now and then.
Streamlining and Securing: The Benefits of Half Doors in Daycare Centers
The installation of half doors secures, streamlines, and maximizes the efficiency of a daycare center. When properly installed, these doors serve several important functions that improve the safety and well-being of both children and caregivers by providing a higher level of control over outside entries and exits.
Because of their low profile, half doors serve as an important first line of defense against intruders or hostile threats. This design allows for early access observation through fixed security windows while blocking any unauthorized persons attempting direct entry into high-traffic areas such as lobbies or recreation rooms. The barriers also provide additional visual cues to alert administrators of potential risks in the absence of normal activity.
What is most appealing about half doors is that they can be adapted to interlock existing systems with customized protocol frames to refine operational procedures used within a daycare center. These specialized adaptations strictly limit exit pathways, monitor corridors during travel times, save ramp space compared to traditional slider-type versions, and securely lock away closets or storage facility rooms during off hours. Allowing for the efficient implementation of various types of establishments such as nurseries, senior centers, after-school programs, and faith-based organizations with minimal accommodation disruption.
Half-door systems provide unparalleled flexibility when creating designated safe zones, with a variety of styles suitable for different applications ranging from low-foot traffic areas such as waiting rooms or administrative offices to larger recreational spaces such as play areas or study halls. With simple customizable installation techniques supported by fire regulation-approved codes in addition to tested heavy-duty materials in support structures, they are almost indestructible while offering clean sliceable lines and subtle modern improvements throughout building infrastructure, making them timeless devices suited for today’s trending needs towards greater organizational profiling resources.
The use of half-doorway models in daycare centers has grown rapidly over the last decade due to their convenience, dependability, and cost-effective options that can be tailored to suit any desired preference or purpose. Quality goal-oriented equipment remains an integral component when seeking proactive, manageable solutions needed to run successful, functional childcare services living up to safety standards.
Enhancing Safety While Preserving Visibility with Half Doors
For vehicle owners who want the benefits of both a full door and improved visibility, half doors are an ideal solution. A half door is essentially a split-style car door, with one side remaining open while the other is hinged and closes to help ensure the driver’s security while still allowing convenient access to the inside of their vehicle. This type of door provides enhanced protection against inclement weather or external dangers while also providing a clear line of sight when driving.
Half doors were originally developed by 4×4 manufacturers to provide better overall safety protocols combined with optimal visibility—something that traditional full doors could not provide. They use shorter doors connected at the frame to keep them securely closed while still allowing passengers to enter and exit. Half doors can be opened from the inside or outside, depending on your needs. Furthermore, because they are made up of sections rather than two full doors, they are lighter alternatives to traditional doors made of heavy steel or alloy materials.
Another advantage of using half doors is that the windows in many versions are larger than those found in typical cars with four (or more) unconnected sections, which ultimately communicates greater visibility during travel times; this is especially useful if you’re going off-road through narrow pathways or engaging hazardous terrain. Many drivers report that being able to properly see their surroundings when traversing tricky trails makes them feel safer than not knowing what lies ahead or blindly maneuvering around corners, as might occur with standard side mirrors alone. Finally, you will feel secure behind the wheel and confident enough to embark on almost any type of adventurous excursion.
To protect yourself even more against inclement weather without sacrificing too much natural lighting or clear sightlines, some companies now offer 40 percent tinted windows on certain types of half doors that are specifically designed with your privacy in mind—ideal for those locations where intense sunlight and stuffy interiors may become weekly occurrences during the summertime months! Furthermore, most of these models are protected by lamination treatments for rust protection and longer longevity—a must-have if you choose property traverse areas prone to quick deterioration due to environmental factors like salt spray along waterside regions closer to coastal cities.
In conclusion, there are numerous benefits to installing half-doors on your vehicle, such as increased driving lift and improved passenger accessibility, all while maintaining elevated visibility, unhampered external sources, and unpredictably adverse climates, making them the go-to option for nearly any level of auto enthusiast looking to secure a smooth journey no matter what terrain comes waywardly placed on their itineraries!
Maximizing Space Usage with Half Doors at Your Daycare Center
Using half doors to maximize space at your daycare center could be a great way to give your child care facility added convenience, privacy, and efficiency. Half doors allow adults to supervise children in adjacent areas without having to keep the full door open, while still providing easy access when needed. They also provide an additional level of security for parents who want to ensure that their children are safe and accounted for.
Half doors, which can be installed as interior or exterior doors, have several advantages over full-sized doors. For starters, they provide more consistent visibility between hallway corridors and playrooms than a fully closed door; room attendants can observe activities in rooms on either side of the door without invading the occupants’ privacy. This is especially important for small daycares that need to save space by having multiple rooms share one common space.
Another advantage of half doors is their adaptability in terms of layout and design. As movable elements within a structure, they can accommodate irregular shapes and spaces that may not accommodate standard-sized doorways. They also come in a variety of heights and materials, such as lightweight wooden frames or sturdier steel frames, so you’ll have plenty of options to ensure the new door blends in with your existing decor.
Finally, half doors are low-maintenance and have built-in features that make them durable enough for high-traffic areas such as children’s hallways. Some models have special hinges that automatically adjust the gap between each hinged panel based on how frequently it is used; this prevents premature wear and tear. Furthermore, these types of doors are equipped with locking systems to prevent unauthorized entry, but toddler safety inside cribs or beds is encouraged, among other things, for supervision purposes.
By implementing halfdoors at your daycare center, you are ensuring greater visibility throughout your premises, creating a more secure environment for both young minds and guardians alike, all while embracing convenience through flexibility in design given any odd-shaped rooms or corridors you may encounter due to their customizable nature paired up with simple maintenance, making them ideal for areas like yours where everyday use occurs, thus minimizing unwanted incidents.
Installing Durable and Practical Half Doors in Your Daycare Environment
Installing durable and practical half doors in your daycare environment can be a great way to provide an extra layer of protection for the children in your care while still allowing you to monitor their activities. This article delves into the specifics of half-door installation and the benefits it can provide your company.
Half doors are typically made of wood or metal, with transparent panes running the length of the design. They provide security through a locking mechanism, which is frequently integrated into the same frame as the handle. The lock is simple to use and extremely strong, so you can be confident that your space will be safe even if something unexpected happens.
Aside from the safety advantages, half doors are also visually appealing. They allow natural light to flow freely into whichever room they are installed in when painted in bright colors. This contributes to the creation of a welcoming environment in which staff and parents alike can feel at ease when visiting your childcare facility. They also serve as a point of decoration, giving each room a distinct personality.
The durability of half-doors ensures that they will last for many years, no matter how active the children are! Because of the robust hinges and frames, it is rare for any part of these doors to become loose over time; thus, once installed, there is minimal maintenance involved in maintaining them; just keep up with routine check-ups to ensure everything is running smoothly on both sides of each panel.
Finally, when purchasing half-doors, investing in high-quality materials such as solid wood is always a good idea. These doors are well worth the investment, especially given the added peace of mind they provide.
In conclusion, installing durable and functional half doors in your daycare environment not only increases safety but also improves aesthetics, creating an inviting environment for both children and staff! These useful additions make managing busy days much easier, with efficient locks integrated into their frame or handle system and sturdy construction ready for long-term use.
Creating Happier Spaces with the Aesthetic Appeal of Half Doors for Daycare Centers
When it comes to creating a welcoming and home-like environment for daycare centers, half doors can provide an aesthetic appeal that helps increase a sense of well-being. Half doors fit snugly in doorways and provide a sense of security while still allowing for more visibility than full-height doors. These appealing features, which provide both privacy and visual openness, are an ideal addition to any daycare center.
Half doors frequently feature vibrant colors or charming designs to brighten up the space, making them especially appealing to children. They allow caregivers to keep a close eye on their children without requiring them to adjust to being enclosed within walls. Adults gain peace of mind knowing they can take corrective action if needed by quickly glancing over at their playmates, adding a sense of security while providing unrestricted view access.
The lightweight construction also ensures that adults can easily open and move them out of the way when necessary or desired. Children are not allowed to tamper with the door’s light frame, which adds another layer of assurance for adults who want even more safety parameters for their classrooms full of growing toddlers.
Creating happier spaces is critical in today’s modern daycare centers because parents have increasingly high expectations for learning environments that are characterized by fun and joy rather than drabness, gloominess, and dread. Half doors meet this requirement by providing bright and cheerful entrances without sacrificing functionality, something that hard-pressed administrators everywhere will appreciate as they design special areas filled with love and care specifically tailored to your child’s age group. Furthermore, they help to reinforce every parent’s wish, giving them an increased sense of safety while helping children nurture feelings of security inside the classroom and fostering positive interactions through shared activities such as dancing, singing, building blocks, story time, painting, and more!
Conclusion
Because of their versatility and safety features, half doors are an excellent choice for daycare centers. Half doors can help limit noise, regulate temperature, and promote good behavior, in addition to providing access to all areas for childcare workers. They are also simple to install and require little maintenance, making them less expensive than other options. Half-doors allow daycare centers to keep an eye on children while allowing them to roam and explore within designated boundaries.
Excerpt
Half doors are ideal for daycare centers because they give adult caregivers easy access to their charges. They also allow children to see outside and maintain their independence while remaining safe. The half-door design is both aesthetically pleasing and extremely functional.

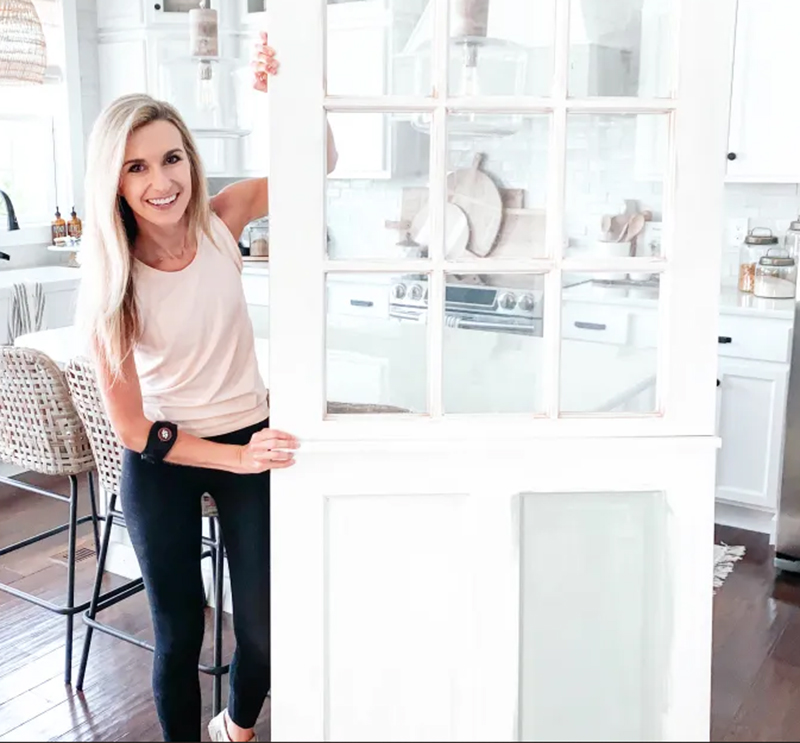
We’re Emma Carole Paradis and Kimberly Carole, the owners and designers of Impeccable Nest, based in Bedford, New Hampshire. A mother-daughter team with a love of design. Originally from Manhattan Beach, California, now based in Bedford, New Hampshire, we bring a Southern California cool and New England tradition to our design. Not only do we work together…we also live together in a multi-generational home…and a home that they are known to design for others.