

Unlocking the Charisma of Top 15 Small Tattoos for Men
Are you considering getting a tattoo but don’t want something too flashy or large? Small tattoos are an excellent choice for men who want to express themselves…
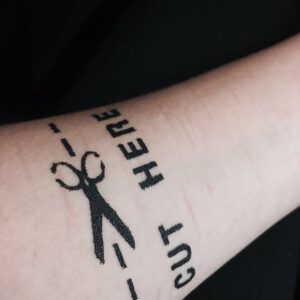
Self Harm Tattoo Meanings: Transformative Tattoos and Recovery Stories
Self-expression can take many forms, and for some individuals, tattoos serve as a powerful means of communication. Tattoos have long been utilized as symbols of personal experiences,…
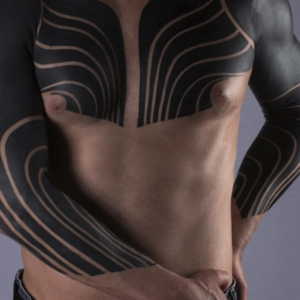
Black Out Tattoo Meaning Exploring the Depths of Inked Darkness
Blackout tattoos have gained significant popularity in recent years, intriguing tattoo enthusiasts and artists alike. These captivating designs deviate from the traditional approach of adding intricate details…

Small Men’s Tattoo with Meaning Express Yourself through Ink
Small tattoos have become increasingly popular among men in recent years. These compact pieces of art offer a unique and meaningful way to express oneself. With the…

1 of 1 Tattoo Meaning: The Deeper Meaning of 1 of 1 Tattoo Art
The realm of body art has always been a fascinating domain for self-expression and personal empowerment. Among the vast array of tattoo designs and symbols, there is…
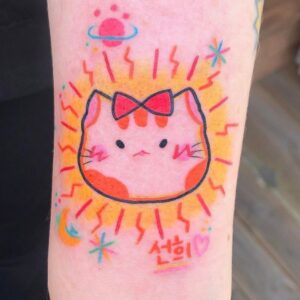
Cute Small Tattoos with Meaning: A Timeless Expression of Self
In the world of body art, tattoos have always been a powerful form of self-expression. They allow individuals to showcase their personality, beliefs, and experiences through intricate…
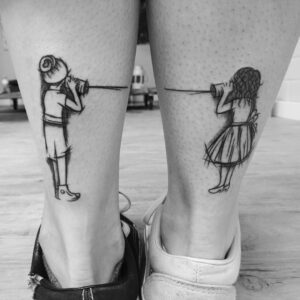
Tattoos for Best Friends with Meaning: Celebrating Lifelong Bonds
Tattoos have long been a form of self-expression and an art form that allows individuals to showcase their unique personalities. One particular trend that has gained popularity…
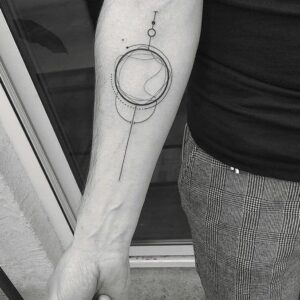
Circular Tattoo Meaning: Unlocking the Symbolism of Circular Tattoos
Have you ever wondered about the meaning behind circular tattoos? These timeless designs have captivated people for centuries, with their intricate patterns and symbolic significance. In this…
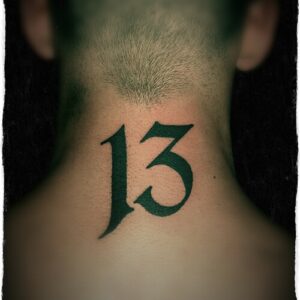
Tattoo 13 Meaning: The Allure and Symbolism of 13 Tattoos
Tattoos are not just ink etched on skin; they carry deep meanings and profound symbolism. Each tattoo design holds a unique significance, representing personal beliefs, experiences, or…
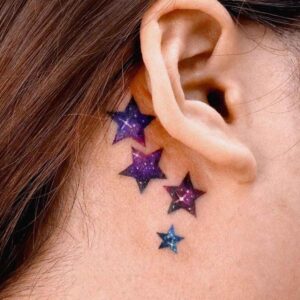
Star Tattoo Meaning Behind Ear: From Classic to Contemporary
The star tattoo is a popular design that holds deep symbolic meaning for many individuals. When placed behind the ear, this captivating location adds a touch of…